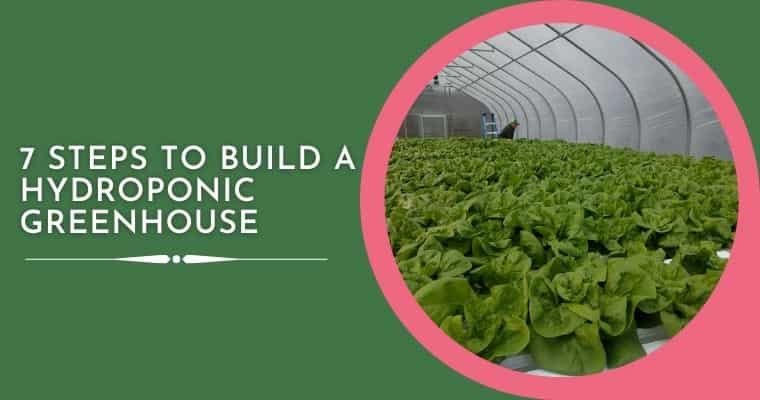
To take your hydroponic cultivation to the next level, you will have to build a hydroponic greenhouse. Depending on the scale of your cultivation, you can decide the area of your hydroponic greenhouse. A commercial hydroponic greenhouse is a gigantic structure designed to sustain all flora.
To create such a structure, you will need accurate information about the construction process. Below mentioned are the phases to build a hydroponic greenhouse.
Things You Might Also Want To Know:
- How To Build A NFT Hydroponic System At Home?
- How To Build The Hydroponic Drip System?
- How To Build A Recirculating Deep Water Culture System?
How To Build A Hydroponic Greenhouse?
Any construction work ranging from a bridge to a Greenhouse consist of faces. Each phase focuses on a specific feature of the construction. When it comes to building a hydroponic greenhouse, the description must be more elaborate. In this section, you will learn how to build a hydroponic greenhouse in different phases.
Phase 1: Planning
There is a variety of ideas to build your hydroponic greenhouse. Many services offer varieties of different styles and structures to meet your scale of production. The first phase on how to build a hydroponic greenhouse starts by planning the structure.
It is one of the most critical and vital phages that determines the quality of your hydroponic yield. Before planning your structure, be aware of your surroundings and climatic conditions. Then, you can progress your planning by selecting a proper site to build a hydroponic greenhouse.
Each structure is suitable for different plants, climatic conditions, and applications. For instance, hydroponic greenhouses for deep water culture won’t be similar to that of drip system hydroponics. At the same, you will have to maintain the local ordinances before building a hydroponic greenhouse.
Rules are regulations for the construction process vary from place to place. It would be wise to check the guidelines of your town’s building department. Taking this step will ensure maintaining the establishment code of your area without breaking it.
On violating rules, you might face heavy penalties. In some localities, the authorities might cease your property for any construction. Apart from these issues, come climatic conditions.
If you live in a tropical climate, it’s genuine to expect unexpected showers. Therefore, it is better to have a sloppy roof rather than domed or flat ones. All these aspects must be taken into account before building your hydroponic greenhouse.
Phase 2: Base Structure
To build a hydroponic greenhouse properly, you’ll need to install proper entry and exit ways. Finding ideas on how to build a hydroponic greenhouse would be futile without building the proper base structure. These two ways must be functional and flexible at the same.
Depending on your planned structure, you can choose a variety of doors. Different doors are ranging in all colors, sizes, and prices. Doors in a hydroponic greenhouse are very different from industrial or household ones.
Select those of good quality that are guaranteed to last for a long time. To build a hydroponic greenhouse, you’ll need a well-insulated environment. Therefore, building material must be a poor conductor of heat.
For such purposes, plastic doors are better than wooden ones. Plastic doors keep heat confined inside the hydroponic greenhouse without letting it escape. On the other hand, wooden doors absorb large amounts of heat and dissipate it in the environment.
If you reside in a coastal area or near the equator, the wooden doors of your hydroponic greenhouse might rot soon. A Rotten wooden door will invite harmful microbes that will invade your hydroponic system. On the other hand, plastic doors are nonbiodegradable and can last up to nearly a decade.
If you want to build a hydroponic greenhouse permanently, masonry is the skill you need. Depending on the scale of your cultivation, dig for holes in the ground to install steel rods. These roads will be an integral part of the frame of your hydroponic greenhouse.
Phase 3: Covering
If you are thinking about how to build a hydroponic greenhouse, you can’t skip covering your area with the necessary materiaGreenhouseuse growers must find the right greenhouse covering to keep their plants safe from the external environment. Any compromise with price or quality in the stage can be very critical for the plants.
There are varieties of covering materials and films to protect your plants from excessive UV radiation and unwanted sun rays. On choosing the perfect film as a covering inspect a wide range of inventories. You will find materials such as polycarbonate and polyethylene films which are specially designed to build a hydroponic greenhouse.
Don’t ignore the participation of the hardware in keeping the covering intact. To avoid the mess you can also purchase materials life jumper hoses and glazing bar caps. These materials ensure the covering to be in the right proportion by closing all voids.
The first step to cover your hydroponic greenhouse is by installing glasses on the frame. Before installing glasses, make sure that the frame is been divided into smaller square units. Then, add square pieces of glass according to the size of the smaller frame.
Many novice gardeners leave the covering process incomplete by only adding the glass fragments. Without an extra protective layer, the glass fragments can be broken by external agents like birds and animals.
In the case of hailstorms, the situation gets worse and can bring huge loss to your hydroponic greenhouse and plants in it. Therefore, install an outer covering like transparent polyethylene films. You can also opt for polycarbonate ones, but the former is more popular to build a hydroponic greenhouse.
To protect your hydroponic greenhouse from hailstorms, build a steel mesh that covers the entire system. If your system is placed under a canopy or another roof, there isn’t any need for steel meshes.
Phase 4: Ventilation
Appropriate ventilation is basic for a nursery to work appropriately. The ventilation arrangement of a nursery gives natural CO2 to the plants. It assists with controlling temperature and mugginess and decreases the probability of infection.
Hydroponic greenhouses are commonly encased structures that won’t ventilate all alone. So, as to guarantee that legitimate ventilation in the nursery is accomplished, plant specialists must introduce either an aloof or controlled ventilation framework.
To be more specific, they are several ventilation systems available to build a hydroponic greenhouse. One such ventilation system for a hydroponic greenhouse is passive ventilation.
Passive ventilation is a framework with no mechanical segments. As such, there are no controlled fans associated with passive ventilation systems. However, the hydroponic greenhouse is ventilated using convection where hot air turns out to be less thick and ascends through the edge vents.
With the edge vents, a passive ventilation framework needs consumption vents to permit cool air to enter the system. Meanwhile, it uproots the hot air as it rises. These admission vents are commonly positioned on the lower segment of the side dividers of a hydroponic greenhouse.
The biggest favorable position of passive ventilation frameworks is that they are practically quiet. This can be worthwhile for a nursery worker whose nursery is appended to their home and the clamor of a controlled fan would be an aggravation. The greatest burdens of an inactive ventilation framework are cost, support, and proficiency.
A fueled ventilation for a hydroponic greenhouse is a framework with a controlled fan and vents. The cubic feet of the hydroponic greenhouse space will be the deciding variable for estimating a fan framework.
The base objective is to get the cubic volume of air turned over in under two minutes. Then, a fan will be estimated to turn over the air in a moment. A fast turnover makes it a lot simpler to control the temperature of potentially moistness, keeping the nursery around 10 degrees cooler than an inactive cooling framework.
The fan ought to be introduced on the top segment of the divider inverse of the admission vents and screen entryway. At the end of the day, the admission vents ought to be introduced on a similar framework. Then, the entryway and the fan should be installed on the highest point of the contrary divider.
Phase 5: Heating
To introduce a satisfactory warming framework, see how the heat is sent through the hydroponic greenhouse. Also, assess the heating prerequisite of the structure. Cool harvests like carnation and snapdragon are among the first to be filled in a hydroponic greenhouse.
Throughout the colder time of year, the variety of yields including exotic species needs heat and light. It becomes necessary to lessen the fuel cost and of a superior proficient warming framework accessible to nursery directors.
Generally, solar radiation is a reliable source of energy that acts as a light and warm source. A hydroponic greenhouse should be made with the goal that it will receive the greatest profit of daylight. Besides, the measure of daylight accessible to plants change with the basic edge, the covering material, the encompassing geology, and the direction of the hydroponic greenhouse.
The scope, season, and day, just as the sky spread will likewise adjust the daylight availability. Hydroponic greenhouse coverings, due to their resistivity for sun-oriented energy, will affect interior temperatures. It can have high absorptivity for sun-powered energy and to change over approaching radiation into heat.
Mats or frameworks can be utilized for base warmth with pots or pads on them. These frameworks are reasonable for hydroponic greenhouse activity since they are costly to run and purchase. A greater hydroponic greenhouse would utilize a much productive framework.
The warmth source is an electric radiator constrained by an indoor regulator set under the seat. The lower part of the seat is encased with dark plastic, which contained the warming, therefore, warming the lower part of the seat. The warmth travels through the lower part of the seat so that there will be better root advancement.
When unit radiators are utilized to deliver heat in the nursery, a temperature angle can be made. To maintain a strategic distance from this marvel, it is smarter to put unit warmers at the furthest edges.
Phase 6: Monitoring
As hydroponic greenhouses are intended to give controlled climatic conditions, it is important to screen. Moreover, it is also important to control and keep up the boundaries that are fundamental for plant development. Since outside ecological conditions are not consistent, it gets reasonable to alter within natural conditions to conform to the external changes to accomplish higher harvest yield at least expenses.
A hydroponic greenhouse climate checking framework causes you to screen and control different boundaries. It might include factors like temperature, stickiness, light, water system, pH level, soil dampness, carbon dioxide (CO2), etc.
It is essential to keep up the necessary temperature for each sort of plant. Aside from the variances in outside temperature, changing nursery temperature must be kept up. Plants intake carbon dioxide and deliver oxygen by producing heat in this cycle.
This aids in the development of harvests that require a lot of warmth when the external temperature cools down. In any case, for the plants that don’t need such a great amount of warmth to develop, it can make harm and lead to plant illnesses.
Humidity is another significant factor basic to keep up plant development. Plants grow well in warm and damp oxygen as they develop and measure CO2. This makes the hydroponic greenhouse climate normally hotter and soggy with time.
A few plants require a high moisture level while some need less. The presence of high moisture may prompt the development of unfriendly bacteria which can be very unsafe for the new harvests.
Phase 7: Floor Benching
Benches serve a significant capacity to build a hydroponic greenhouse. It is steady, and very much designed for developing plants. When appropriately positioned, it is effectively open to the nursery specialist for the water system and other plant upkeep errands. In specific situations, plants can be developed legitimately on the floor of the hydroponic greenhouse.
This technique urges the floor to be very much depleted. The procedure is very much adjusted for bedding plant cultivators in enormous units. Yet, the steady twisting might be tiring for greenhouse laborers.
Given the difficulty of the utilization of the nursery floor for developing plants, the utilization of seats is suggested. Numerous viewpoints should be considered during the establishment of hydroponic greenhouse benching.
The peninsular plan is utilized when the developing region should be augmented. This plan is for pot-developed plants since it considers helpful isolation of species which is invaluable for retail cultivators. A significant preferred position of the peninsular plan includes watering, steam cleansing, and treatment.
Plant harvesting becomes simpler to do with a peninsular plan than with longitudinally positioned seats. This is particularly obvious in research hydroponics where various medicines are applied all the while. Moving seats is a different yet effective approach to build space productivity.
It permits up to 90% of the floor space to be utilized for developing plants. They are effortlessly moved and are a more productive utilization of room in little nurseries. However, moving seats are not suitable for retail settings or when the plants should humidify a lot.
Things You Need To consider
1. Site
The intention to build a hydroponic greenhouse is to give a warm, radiant spot for your plants. Therefore, it is significant that it must be arranged appropriately in your yard. The ideal direction is confronting the south or southeast to catch the early-morning sun. An east-bound direction functions admirably in many atmospheres.
Try to pick an area that gets six hours of continuous sun every day. If you live in a district that gets critical snowfall, be certain of the snow-load rating of the hydroponic greenhouse. It is to ensure that the system can uphold a cover of snow without imploding.
According to veteran gardeners, the best spot to build a hydroponic greenhouse is on the south or southeast side of the house. The site will be in a radiant territory that gets the most sun from fall through winter (November to February in many spots). If there are no such provisions, the following best area for the nursery is the east side.
The third most ideal choice for a nursery is the southwest or west side. The north side is the final retreat and the most un-ideal site for a nursery. Attempt to arrange the nursery longwise from north to south instead of east to west.
This position gives the structure all the more light and less shade. While unhampered daylight is significant, evening shade might be as significant contingent on the kinds of plants developed and the season they are developed.
2. Layering The Structure
In case you’re wondering how to build a hydroponic greenhouse, choose genuine materials. You’ve to think about different kinds of glass, polycarbonate, nursery plastic, or different materials. Each material will have its arrangement of value, quality, solidness, upkeep, and variety.
Not all materials are reliable in all atmospheres or for all styles of hydroponic greenhouses. Glass is the most excellent, greatest cost choice for nurseries. It is the heaviest material, thus it tends to be the hardest to introduce.
However, if it is shielded with a steel mesh, the glass will outlive some other plastic alternative as far as valuable life. Polycarbonate is a more affordable choice than glass. However, it has various highlights that may make the material to be the ideal alternative for greenhouse establishments.
Polycarbonate is lightweight and simple to work with, which you might discover accommodating. When appropriately treated with UV stabilizers, you may you can expect the durability to be more than a decade. Polycarbonate boards are additionally accessible in a different scope of twin wall and triple-divider boards.
So, you can utilize polycarbonate in numerous applications where protection is significant. On the disadvantage, similar to any plastic, polycarbonate will inevitably corrupt from UV presentation. The most reduced value choice, the poly film can be a decent choice to build a hydroponic greenhouse.
On choosing this alternative, spending plans are little, but durability isn’t more than the former ones. Besides, unlike Polycarbonate, this alternative is more difficult to work.
3. Framing Materials
One of the most fundamental pieces of a hydroponic greenhouse is the outline. Without a decent, rigid casing, the system won’t stand well and might fall. Luckily, there is a wide assortment of materials to work with regards to outlining.
Every material has various advantages, and understanding the features should assist you with settling on the correct choice. Aluminum is a well-known material for outlining nurseries. Aluminum is lightweight and won’t rust or disintegrate like different materials.
One of the disadvantages of aluminum is its inability to insulate the system. It doesn’t keep up the heat as effectively as different materials which leads to a lot of warmth getting away from your nursery. Aluminum will shield your greenhouse from rain and harmful sun rays.
However, it may let the frame down in harsh breezes or hefty days off. The material isn’t sufficiently hefty to persevere through outrageous climate conditions. Plastic is another mainstream decision with regards to hydroponic greenhouse outlines. It is strong and can confront a wide range of harsh climates.
The slight disadvantage is that after some time it can twist. Plastic tends to extend and contract with heat and nonstop presentation to the sun. For more than quite a long while, this will begin to affect the material. Utilizing a light shaded sap base can help defer the impacts of this somewhat, albeit some twisting is still liable to occur.
The wooden outline is another popular element among veteran gardeners. Wood is rigid and durable, empowering it to confront a wide range of climate conditions. It is likewise a decent protector for a hydroponic greenhouse to hold more warmth. Wood is genuinely simple to work with, making it a common choice for most novices.
4. Flooring Materials
Before thinking about how to build a hydroponic greenhouse, you might need to think about your materials for its floor. Floors are the establishment of the nursery in a larger number of ways than one. They have facilitated ideal seepage, protect the environment from temperature drops, keep out weeds and vermin, and they likewise should be agreeable for you.
Numerous nursery flooring choices are accessible to experiment with. There are a few choices for nursery flooring materials. The best is a poured concrete floor, particularly if it’s protected.
A concrete floor is however difficult to clean and stroll on whenever poured effectively. Generally, it can’t deplete away any overabundant water. Concrete will likewise be a mirror lighting and holding heat for the day.
Igneous rocks are an appealing nursery flooring idea. It absorbs water and adds to the dampness level, but magma rock is difficult to clean. They are simple materials to use; nonetheless, they can be costly.
Much flooring is futile of ground surface material for hydroponic greenhouses. While it is modest, it can’t be cleaned and harbors microscopic organisms and parasites. It additionally deteriorates quickly.
How Much Does Building Hydroponic Greenhouse Cost?
The cost of building a hydroponic greenhouse depends upon various factors. The average estimate cost to build a hydroponic greenhouse might cost between $7380 to $28,370. Many costs build up the overall budget to build a hydroponic greenhouse.
Depending on the location, the building materials and construction services are standardized. If you are thinking of building a commercial greenhouse, you must spend more than a personal one. Layering costs and service standards might be per unit or contract basis.
Not all types of hydroponic greenhouses can be utilized in all climatic conditions. In simple words, there is a wide range of hydroponic greenhouse designs. If you want to keep your greenhouse isolated from home attachments, you’ll have to pay more.
Greenhouses associated with the main home costs relatively lower than isolated ones. Hope to receive a payment invoice in the range of $40,000 to $100,000 for an acre of the greenhouse. There are 43,560 square feet in a section of land. If you are expanding on various acres of land, you probably will pay under $2 per square foot.
Building a domed nursery costs $5 to $10 per square foot. For reference, a 20-foot band house steel outline costs around $560 and does exclude the covering or end dividers.
Installing a heater in a nursery costs somewhere in the range of $50 to $2,000 or more. It knocks the construction cost up to $17,930 to $19,880. It does exclude power consumption bills or the expense to keep up a warmed space.
Final Thought
Each home nursery worker longs for claiming an affordable hydroponic greenhouse. It permits you to get a head start on spring planting and to expand the developing season well into harvest time. Huge loads of choices are accessible to build a hydroponic greenhouse. The choices include pre-manufactured houses and reasonable packs that accompany all you require to complete it yourself. This article solves all your queries ranging from installment cost to material used.